
DIY Fast Laptop Build Under $400
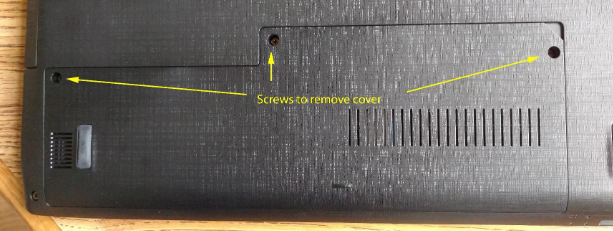
Laptops are EXPENSIVE as an IT manager I should know, I am constantly purchasing laptops for my team. I have found a method to get amazing performance out of a cheaper $350 laptop just by doing 1 simple upgrade. This is not a gaming laptop, this laptop will be a really good fit for offices/workstations and for students. To access the slot to install the new part you only need to remove 3 screws. The manufacturer ha made upgrading this laptop very easy.
Here Is What You Will Need
Below are links to what you will need and a few products I would recommend with this setup. You may have a small screw driver around to accomplish this without ordering a set, but it helpful to have around when working with other electronics also.
There are mixed Reviews for this laptop on Amazon. That is because without upgrading it, the hardware the laptop comes with does not work well together. Scan though more of the comments if you need proof that this laptop can be made into a affordable workstation. I have setup about 10 of these and not had a single complaint about performance or any issues.
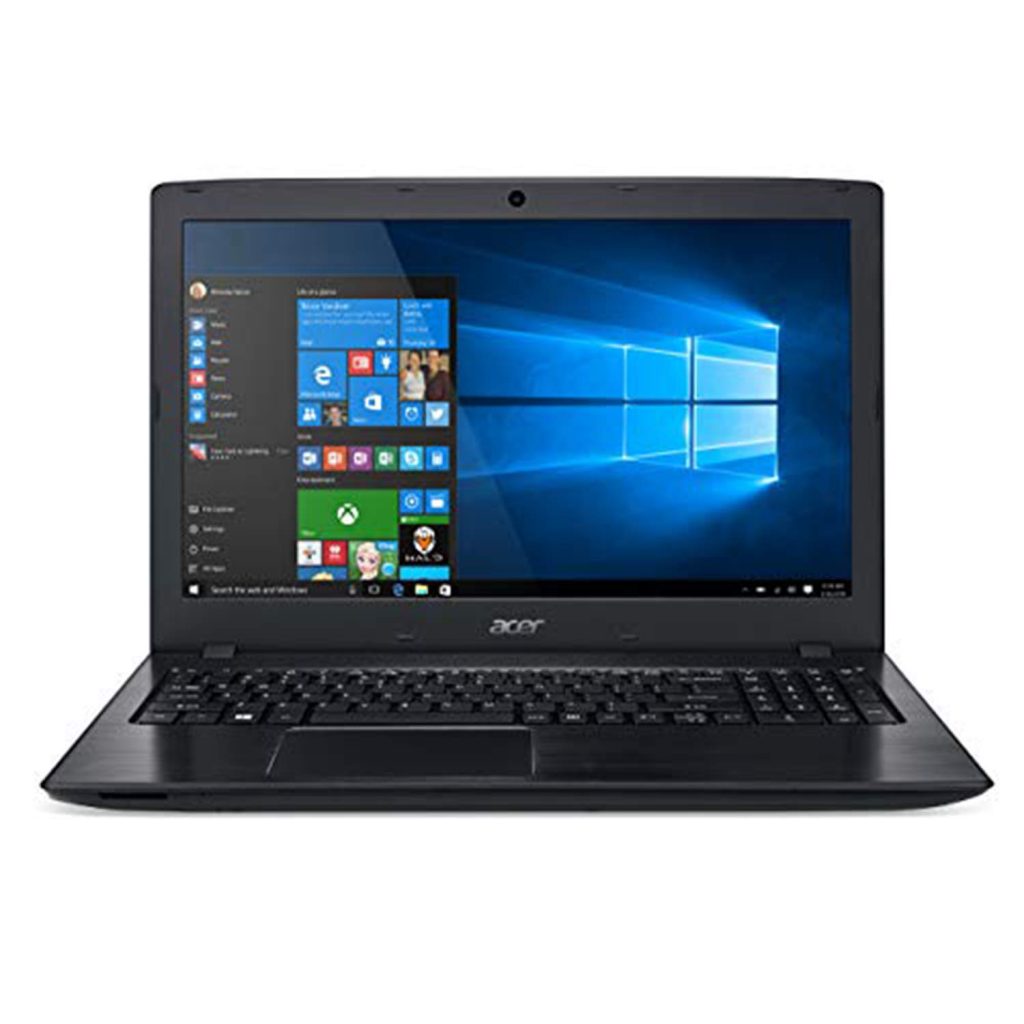
- The Laptop and New Drive – Acer Aspire E 15, 15.6″ Full HD: i3 (8th Gen), 6 GB of RAM, and 250gb SSD
- A USB Flash Drive 8GB or More – Kingston 16GB USB
- A Small Screw Driver #0 Philips – Showpin Mini Precision Tool Set
- (Optional) Best Selling Mouse – VicTsing MM057 2.4G Wireless Portable Mobile Mouse
- (Optional) Best Selling Mouse Pad – VicTsing Mouse Pad w/ Stitched Edge
- (Optional) Amazing Laptop Bag – KROSER Messenger Laptop Bag
Mechanical Hard Drives Slow Down Computers
Most lower end laptops come with mechanical hard drives. That means when you need to load a program or boot windows a motor has to drive a disk that store data magnetically that is read by a arm etc… There are too many moving parts.
Doing a extremely simple upgrade to replace that mechanical hard drive (HDD) with a digital drive (SSD) that has no moving parts can increase your laptops performance 10-fold.
Step One - Create Installation Media
We will be replacing the hard drive on this computer. Currently the computer comes with windows 10 installed. You will need to create installation media using the new flash drive. This will be used to install windows 10 on the new drive after it is installed. The new hard drive is completely empty when you purchase it, that is why we need to install windows 10 onto it.
You must download and create the installation tool on a windows 10 PC. If you do not have any other computer, setup the new laptop as is and create the tool. Do not download any programs or do anything else to the computer as it will be completely reset when you finish this article.
Below is a button that is the same as on Microsoft’s website. I have simply added it here to save you a step. If you feel more comfortable downloading directly from Microsoft’s website click this link and follow their instructions for creating the installation media.
- Select Download tool now, and select Run. You need to be an administrator to run this tool.
- If you agree to the license terms, select Accept.
- On the What do you want to do? page, select Create installation media for another PC, and then select Next.
- Select the language, edition, and architecture (64-bit) for Windows 10.
- Select which media you want to use:
- USB flash drive. Attach a blank USB flash drive with at least 8GB of space. Any content on the flash drive will be deleted.
- ISO file. Save an ISO file to your PC, which you can use to create a DVD. After the file is downloaded, you can go to location where the file is saved, or select Open DVD burner, and follow the instructions to burn the file to a DVD. For more info about using an ISO file, see Additional methods for using the ISO file to install Windows 10 section below.
- After the installation media is created, follow the steps below to use it.
After completing the steps to install Windows 10, please check that you have all the necessary device drivers installed. To check for updates now, select the Start button, and then go to Settings > Update & Security > Windows Update, and select Check for updates. You may also wish to visit your device manufacturer’s support site for any additional drivers that may be needed.
Step Two - Install The New Drive
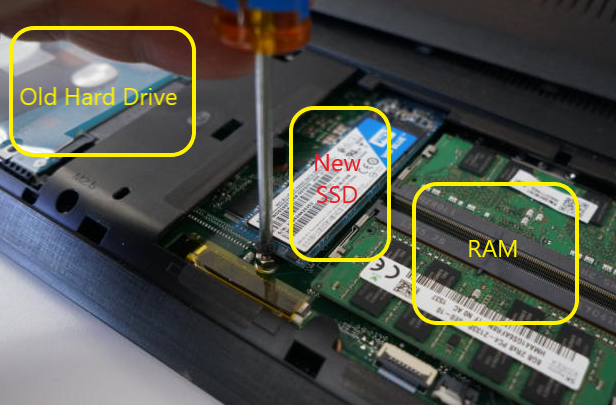
When you open the cover, to the left would be a hard drive, remove it but hold onto it. Just slide it to the left away from the connector it is plugged into, it’s stiff, but once unplugged you can lift it out.
Next to the two filled memory slots on the right, between the two memory sticks and the HDD, is the M.2 (SSD) slot, and down toward you on the circuit board is the standoff that Acer has kindly provided the screw for.
Remove the screw, slide your SSD at an angle into the M.2 slot, once seated (can’t see the gold fingers on the dge of the SSD), it should hinge down to the top of the spacer, insert the screw you removed and tighten gently.
You can now put the cover back on and screw it down.
Step Three - Install Windows 10
- Insert the USB drive that you used to create the installation media with into one of the USB slots on the side of the computer.
- Now plug the laptop into its charger and power the laptop on.
- Select “custom Install”.
- Select new install (not upgrade).
- This should bring up a screen to select the disk drive, just select the only drive and
- Microsoft will automatically read the license key tell it to use it.
- It Takes about 20-30 minutes to fully install windows, reboot, connect to a network, and install updates.
Congratulations you have finished upgrading your laptop!
Additional Notes
If you have any questions or need assistance please reach out. Refer to my contact page for my information.
Disclaimer. This guide requires you to do a very basic upgrade, you will be removing 3 screws and plugging a part into a slot that was designed to accept it. Excessive force in removing or inserting any parts into your laptop can result in damage and I am not responsible for any damage to your laptop.